If you took a poll of people who skateboarded in the late 70's / early 80's, you would find a strong majority of the skaters rode a Kryptonics K-Beam at some time or another, and most of them would list it as one of their favorite boards. In that time, there was a great amount of innovation going on in skateboard design. By 1979 boards had gone through the "pig" phase and gotten larger, but as a result they had also gotten heavier. Many companies tried various methods for reducing weight. Foam cores, fiberglass, even Kevlar were used to try and get the right combination of strength and weight. At that time, one skateboard manufacturing plant was building a lot of the boards, and that company was Boulder Boards. Their boards got re-branded by Dogtown, Variflex, and Kryptonics too name a few. Boulder Boards was very creative in engineering lightweight, strong boards. They would route out wells in the boards to reduce weight and provide grip. They also came up with the idea of instead of using 7 layers of laminated maple, they would only use 5, but they would place a band of vertical laminate down the center of the board to increase strength. The vertical laminate was the "beam". Other companies used 5 ply boards with additional horizontal beams to accomplish this strengthening as well. ( Powell Beamer, Alva LiteBeam ) Those worked well too, but the vertical beam was by far the most innovative. That board got built for Kryptonics and was named the KBeam. They made a 9.00" wide team version, a 9.75" wide Micke Alba model, a 10.5" Steve Alba model, and a 11.25" team model. After the first run, a second Micke Alba model was made with 3 vertical beams, one down the center, and two on the outside edges that created grab rails. This was called the tri-beam. Not very many of those were made, and I never personally saw one, and only recently have seen pictures. Later a concave team model of the K-Beam was made called the Competition K-Beam. Again, I have only seen pictures of that model, as it must have been a limited run. Boulder Boards also made a vertical beam board called the vertilam that was for a George Orton model. The vertilam had the entire middle laminates vertically placed in the board.
Now, around 1980, the skateboarding industry went through a down phase, and many companies stopped making as many boards. Boulder Boards was affected by this downturn as well, and many of the boards made at the time were stopped.
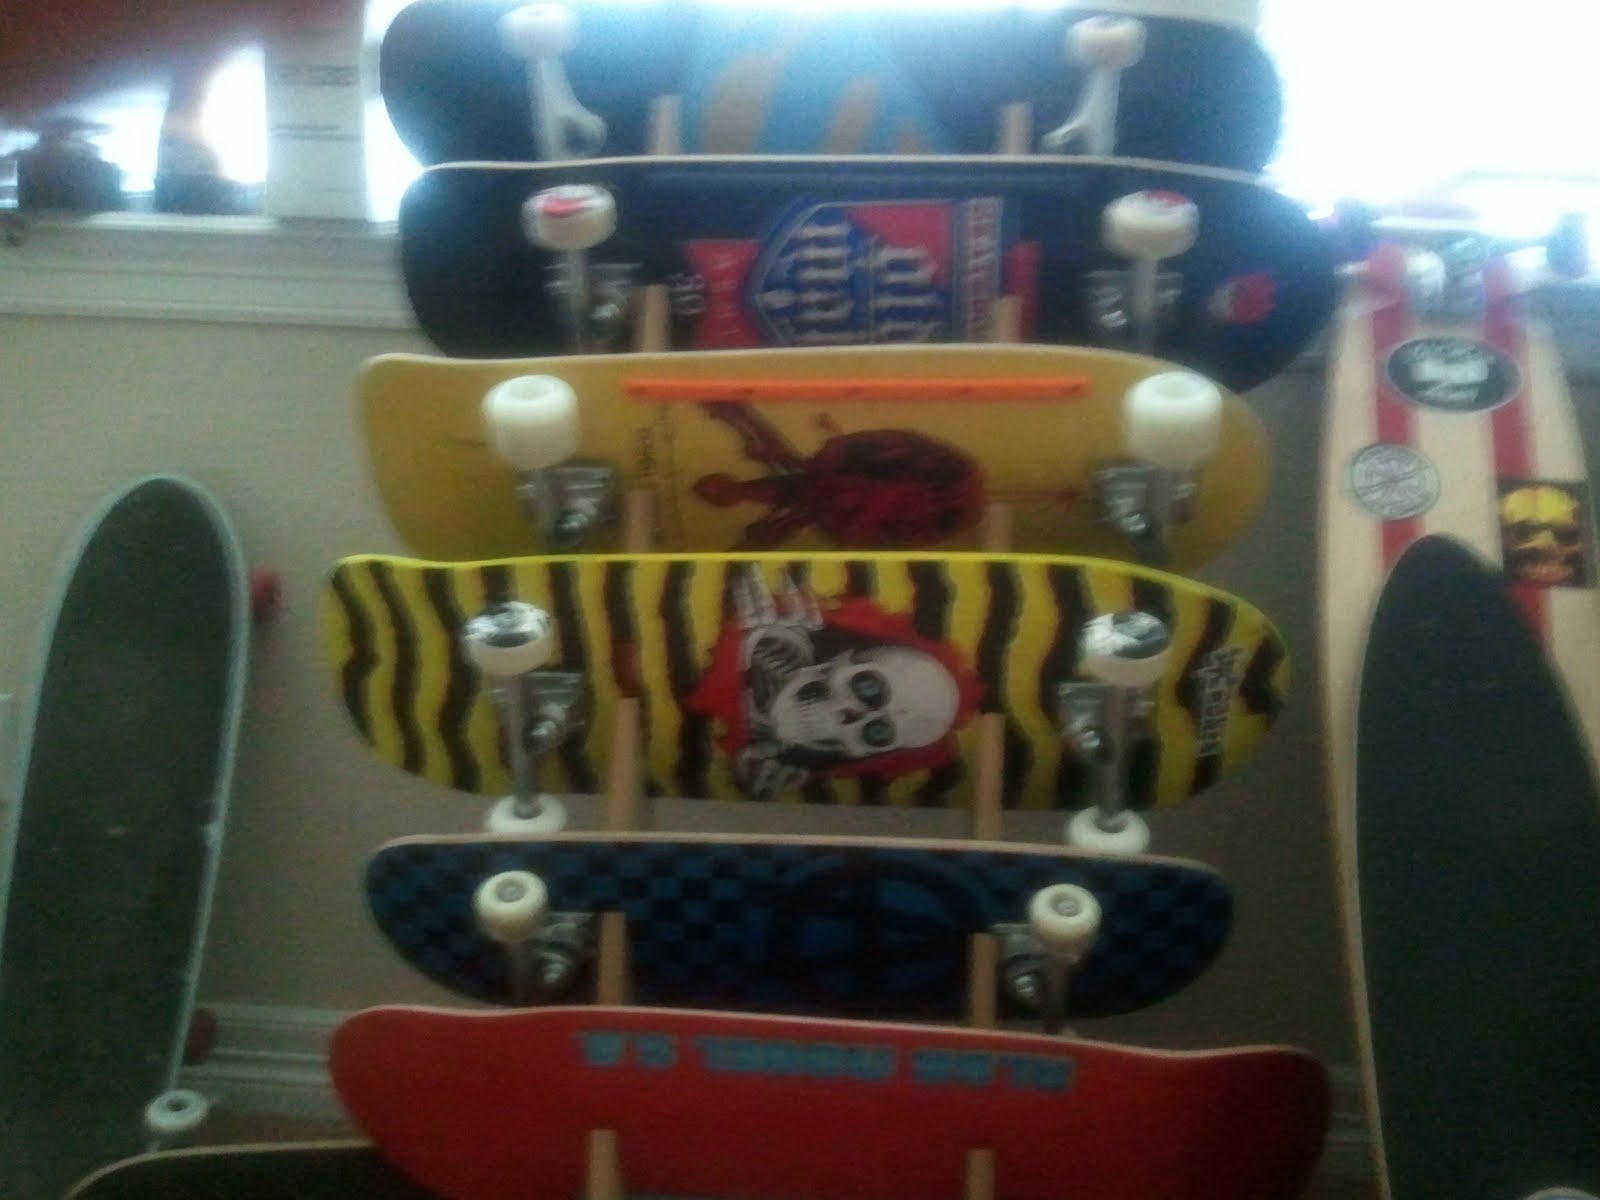
If we skip forward to present day, skateboarding has made quite a resurgence. Many companies make boards, and there are skateparks in almost every town. Modern day boards have evolved to be smaller than their 1980's counterparts, mostly to allow for more quicker flatland / street tricks to be accomplished. Many "older" skaters still look for that larger, pool board that they knew in the old days. Some companies have re-issued the old shapes, and old school skateboard decks can be found in any skate shop and online.
The new shape (Popsicle) may be as evolved as a deck can get, but it lacks style. The innovation seems to have dried up. There are no new shapes really, and certainly no company is pushing the limits of engineering to make lighter or stronger boards. I have a couple of these boards and they are ... ok. Having skated in the 70's, 80's, 90's, 00's, and now 10's I have tried just about every shape size around.
The shape / size / style of board I missed was the K-beam. More specific, the 1979 Kyrptonics Steve Alba model kbeam. I went to ebay, looking for an old shredder. They show up every now and then. But, holy crap! $1000 - $2000 for an old deck. I decided right then, I would build my own.
Building a standard skateboard is pretty easy. You need some maple ply, good glue, a press or mold and a few hand tools. And you usually start with a shape you have. I did not have a Kbeam to trace, or measure, and I certainly was not going to plunk down $1000 to trace one. So I started with one good picture of one.
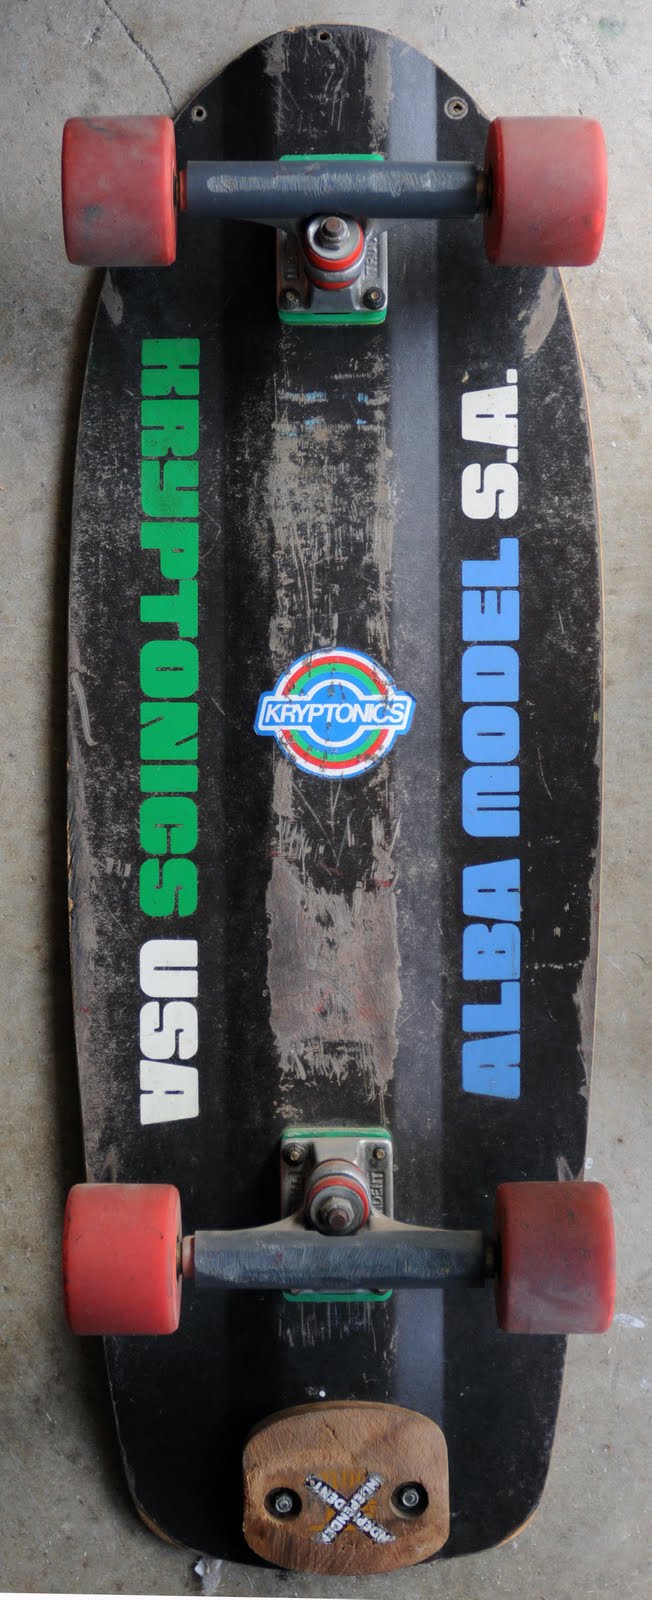
Working from an image is pretty easy, if you know at least one measurement. I knew several. The Kbeam was 30.5 inches long and 10.5 inches wide. Since it was "old school" the truck bolts were 1 5/8" x 2 1/2". Using calipers and a scale ratio from a printout of the above image allowed me to create and exact template of the full sized board. Actually the trick is to make half a template, that way you have an exact shape for both sides.
I then transfer the half shape to a folded piece of butcher paper.
Next, I did all the layouts for the beam dimensions.
The beam, originally was vertical plys of poplar to increase strength. I got some poplar laminate, and glued up the layers.
The real trick with the beam, is cutting the kicktail to the exact degree, while maintaining the angles of the beam running length wise. As you can see from this advertisement for the kbeam from 1979.
At this point there was a gap in building while I did lots of calculating of the angle of the kicktail. In 1979 The angle of kicktails was much less than boards of today. I really wanted to build an exact duplicate, but I also did not want to ignore the benefits of steeper kicktails and concave. I deicided to go with a modified 1979 Salba model, with higher degree kicktail, and a slight concave.
Next was making a mold for the deck. This can be done using a mold of the top and a mold of the bottom made out of hardwood, or cement. Those molds are then fitted to a press to apply pressure from top and bottom forming the horizontal shape of the board. Building presses like this is not terribly hard, but it is very time consuming, and takes a lot of material. If I were planning on mass producing the deck, then this is the way to go, but I am only planning on making a handfull beams. ( maybe 10 )
I pondered this for several days, and then I ran across the Roarockit thin air press.
( http://www.roarockit.com/ ) These guys have come up with a great way to build and design skateboards without the huge time and expense of building a top and bottom mold. Using a bottom mold shaped from 2" insulation and a vacuum system it is possible to bend and shape your deck.
They also sell maple laminate and glue with their kits. I bought the longboard kit, as I needed to fit old school shapes, and I have a couple longboards in mind for later. In the kit is a hand pump for pulling vacuum, and a one way valve on the vacuum bag. I used the hand pump for about 2 minutes when I was laying down the first to layers of maple. It worked ok, but did not provide the vacuum I really wanted, and I knew that I was going to need a bit more once I was bending the plys over the beam. I tried using a vacuum cleaner, and a shop vac, but again I was not getting the pressure I was looking for. Luckily for me, my brother had a stash of Weller Fumux systems for pulling vacuum around soldering stations and welding. The Weller has a vacuum on two sides, and I got parts from the local Ace hardware to hook them in series, when I measured the vacuum pressure it was ~45 PSI. That was just what I was looking for. The foam insulation can take about 50 PSI, so I was pushing it right to its limits. I then removed the Roarockit one way valve, and attached the the Weller Fumex directly to the vacuum bag, so I would pull constant pressure on the deck. Here is a shot of it in action.

The black stuff you see on the top there, is a plastic netting that ships with the Roarockit kit. You must use that, as it provides an airspace for the vacuum. Without it, the opening will just suck down to the wood, and you will not get even vacuum pressures in the bag.
And here you go, here are some "action" shots of the developing build.

The original KBeam had a covering of yorkite on the top and bottom of the board. Yorkite is a vucanized paper product that had no grain, is very durable, but yet very thin. It added a strength to the board, and stabilized the wood veneers as they are bent around the beam. I looked high and low for some yorkite, and it is available for manufacturers, but I could not find any that would be sold to individual or in small lots. I called every manufacturer, and distributor, trying to get a sample size, or small lot with no luck. I did not want to buy a huge roll of yorkite and pull 6 feet off for my project. So here, I had to make a choice. I would continue the build without the yorkite backing. This complicated the build, as since earlier I chose to increase the kicktail angle. The beam had be glued and shaped with the angle I wanted, but that also meant that I was going to be bending the wood a LOT. The yorkite would have helped that, but since I had none, I would have to be very careful as I applied pressure to the laminates. This is particularly important where the kicktail is bending down, and the wood is also bending sideways along the angles of the beam. I was able to do this using a combination of clamping the layers early in the process, and then building the vacuum pressure up slowly as I was bending the laminates.
Since I had no yorkite, I thought about how I wanted to finish the board. My first thought was to use a light black stain, to show the grain of the wood. I opted for a matte black paint, with clear coating to have the graphic lettering stand out more.
I hand cut the lettering, and created a template for application of the graphics. Once they were on, I finished the graphic by hand with a small paintbrush. I applied, a last coat of clear coat, and then wet sanded with 2000 grit sandpaper, to take out any small scratches or imperfections. Then I used automotive rubbing compound, to give it a glassy smooth finish.
So there is the end product. I need to finish the top with grip tape, and the Kryptonics K from the day. I am going to do the whole top with a grip tape design using black and blue griptape. Overall, I am really happy with the end result, and will build a few more, ( one for my brother is already planned. )
I have a set of blue Kryptonics double conical wheels on the way, and some white trackers to complete the setup. I am going to look for some white slider to mount, and may make a custom tail skid for it.
Oh, here is my recreation of Steve Alba's Kryptonics KBeam model next to his current model made by Factory MFG.
And, the inspiration.
I got the griptape in to finish the top. As stated above, I wanted to do the entire top design with griptape, rather than painting and putting on clear griptape.
Got the blue Kryptonics K on.
Now I need to cut and place the black Jessup grip.
I really like the way this turned out. Now a few shots of the board setup, and completed.